

Tuesday, December 20, 2011


Wednesday, July 20, 2011
Beef Wellington and Cheese Pastellitos
I'm on a roll! The success of Monday's cook-a-thon got me very excited for Tuesday night's attempts. Especially because I was flying solo on these: I had no real recipes. First up, Beef Wellington. I look at countless recipes, each one completely different than the other. so, I decided to just wing it. Traditionally, you use a fillet for these, but I didn't want to spend the money. So, I used really nice cuts of sirloin, and it turned out wonderful. I served them with sauteed spinach. Divine!
Recipes are below. I didn't get a pic of the pastellitos, because I gave them to my coworkers before I took the picture. I assure you, they were beautiful :)
 |
| Flaky goodness! |

Beef Wellington
2 steaks (fillet or sirloin, up to your wallet), seasoned with salt and pepper
1/2 package of puff pastry, thawed
carton of mushrooms, I used baby portabellas, chopped
1 onion, chopped
2 cloves garlic, chopped
1/4 c. dry white wine
1 tsp butter
1 tsp olive oil
salt and pepper
1 egg beaten with 1 tsp water
Preheat oven to 425 degrees. Add oil and butter into a pot over medium heat. Once hot, add onions and garlic. Allow to cook for a few minutes then add mushrooms. Once veggies are tender, add salt, pepper, and wine. Cook for 10 minutes, then set aside.
In a preheated pan, cook steaks. Joe likes his medium, so those were cooked for a minute on each side. I like mine more well, so they got 3 minutes per side. Set the steaks aside to rest.
Roll out puff pastry and cut into 4 squares. Place a heaping teaspoon of the mushroom mixture in the middle of a square. Place steak on top of the mixture, then add an additional teaspoon of the mushrooms. Take a second square and place it on top. Seal edges with your fingers. Place on a baking sheet lined with parchment paper. Repeat with second steak. Brush each parcel with the egg wash. Bake for 15-20 minutes, or until the pastry is brown and an internal thermometer registers to your desired doneness.
Sauteed Spinach
1 bag of baby spinach
1 large white onion chopped
1 Tbsp olive oil
1 tsp all spice
salt and pepper to taste
Sautee onion in the olive oil until they start to caramelize. Add spinach and spices. Cook until done, 15 minutes over medium heat. Easy!
Cheese Pastellitos
Again, this may be waaaay off base from any sort of authentic recipe. If so, my apologies. But I've eaten a ton of these over the years, and I think there were spot on.
2 packages of cream cheese
1/3 c sugar
3 tsp milk
1 tsp lemon juice
3 sheets of puff pastry
1 egg mixed with 1 tsp water
simple syrup ( 1/2 c water and 1/2 c sugar boiled)
Preheat oven to 350 degrees.
Allow cream cheese to come to room temperature. Add cheese, milk, and lemon juice to the bowl of your mixer and beat for 3 minutes. While the mixer is still on, slowly add the sugar.
Roll out dough on a floured surface. Cut the dough in the shape of a cross. Then cut each square in half to make triangles. Place a heaping tsp of the cheese onto a triangle. Take a second triangle and cover it, sealing the pastry with your hands. Place on a baking sheet lined with parchment paper. Repeat until all of your dough is gone. Brush each parcel with the egg wash and bake for 10-15 minutes, or until the pastry is puffed and starting to brown. Remove pastries from the oven and brush with simple syrup. Sprinkle on additional syrup if you'd like (I did). Bake for 5 minutes, or until golden. Remove from oven and cool on a rack for 10 minutes.
Tuesday, July 19, 2011
30 by 30: the countdown continues
The last post about my failed quiche really motivated me to kick it into gear this week!
Last night (after work, no less) I decided to tackle three things on my list. I made Julia Child's classic Boeuf Bourguignon, German Pretzel Bread, and Dulce de Leche Ice Cream. Being that I started pretty late after a run to the grocery store after work, I wasn't feeling overly confident that all components would work. But, for the sake of keeping my blog promise, I gave it my best...
Wow. It was just all so good. I don't even know what my favorite part was. The Boeuf Borguignon was so savory, and had layer upon layer of flavor. It was so worth the time. The pretzel bread had the most opportunities for disaster because I'm not very experienced with yeast breads. But, then again, that's why it was on my list. The bread was delicious. It had a salty, crunchy exterior, and the exterior was rich and doughy. A perfect compliment to the Boeuf, as it gave us something with which to sop up the extra sauce :)
Finally, the Dulce de Leche Ice Cream. I recently acquired an ice cream maker from a friend. And while it would have made the process easier, I would have had to freeze the barrel in advance. Since it was not fully frozen, the maker would not operate. Instead, I used the old fashioned meathod: Hand churning. This produced two outcomes: a light and irresistable ice cream, and a right arm so sore I could barely brush my teeth this morning. Oh well, all in the name of food!
Rather than typing out all three recipes here, I've included links below, followed by each recipes' picture. I'm very pleased with the first installment of this weeks' cook-a-thon. Stay tuned for tomorrow, I plan to try Beef Wellington and Cuban Pastellitos tonight!
Boeuf Borguignon


Sorry no pic for this one!
Monday, July 18, 2011
30 by 30: 5 days left
30 by 30 Update:
Things are going...slowly with this project!
I don't even have a picture of this first thing I tried off of my list: Quiche. Two words to describe this experience:
EPIC FAIL.
I don't screw up in the kitchen all that often, so I was pretty peeved when my quiche didn't go as planned. Especially because I was to bring it to a tea party! A quick trip to Whole Foods fixed the problem, but their version was bland at best. Ugh. I will have to try this again! Why is it always the easy things that I can't seem to cook?!?
More experimentations to follow...
Tuesday, May 24, 2011
Seafood with Asian Slaw

I haven't always really been into seafood. Slowly but surely, I've started to come around. This post has two seafood recipes I've made with Asian Slaw. The first is Roasted Shrimp with Asian Slaw. I love Asian Slaw. It's such an easy side dish on a weeknight. I use Broccoli Slaw, which comes prepacked in the produce section. The second is fish tacos. We are big fan of fish tacos, but I don't like that most places fry the fish. Not exactly a healthy option. I made mine with grilled fish, and it was very refreshing. I topped this
with the same Asian Slaw and they turned out very tasty! I would use flour tortillas next time, as we're not the biggest fan of the texture of corn tortillas. Both were very quick and easy to make on weeknights.

Roasted Shrimp with Asian Slaw
1 lb shrimp, deveined
1 bag of Broccoli Slaw
2 Tbsp Olive Oil
1/8 tsp. Basil
1/8 tsp. Oregano
Salt and Pepper to taste
Mustard Vinaigrette (recipe below)
Preheat oven to 375. In a bowl, mix shrimp with olive oil, basil, oregano, salt and pepper. Arrange on baking sheet and roast until shrimp is pink. Set aside.
In a bowl, combine 2 cloves of minced garlic, 1/2 tsp. Dijon mustard, 1/4 c. lemon juice, 1/4 c. olive oil, salt and pepper. Mix well and add broccoli slaw. Arrange into bowls and top with Roasted Shrimp.

Shrimp Tacos
First, I grilled two fish fillets (I used cod) and set them aside. Then I made the toppings. I made an avocado creme for myself (below), and a chipotle avocado creme for the hubby (above). To make the creme I added the following to my food processor: 2 avocados, 1 Tbsp. lemon juice, salt and pepper, 1 clove of garlic, 3 Tbsp. chopped cilantro. When the mixture was smooth, I added a touch of heavy creme. I used this avocado creme on my tacos, then added one full can of chipoltes in adobo sauce to the remaining creme in the food processor. This was the topping for Joe's tacos. I topped them with Asian Slaw. I served these tacos with roasted corn. Yummy!

Friday, May 6, 2011
30 by 30
A funny thing is happening in the food blog world. It turns out that a whole bunch of us are relatively the same age.
We're all turning 30 this year.
Wait, what? 30??? crap.
Actually, unlike most of my friends, I'm not that all upset about turning 30. I embrace it. I lived my 20's. I fell in love, I got 2 college degrees, got married, added Oliver to our family, bought a house, and was blessed to have Abigail. I've added friends and family. I've lost a few very special people. I'm tired of my 20's. I'm ready for my 30's. I expect them to be a bit calmer, but not any less challenging. In fact, to transition from my 20's to my 30's I'd like to give myself a challenge...
A lot of my food blog buds have created a "30 before 30" list of foods they want to attempt before they turn 30. Most of them started this project when they turned 29. When I turned 29, I was 9 months pregnant and not at all concerned with cooking or blogging. Now that I'm back, I'm trying to create that list. I turn 30 on July 23 of this year and this list is to be completed by then. That's not a lot of time. I need to make this list and start cooking, ASAP! I need your help: What would you like me to make? Here's the first half of my list. It looks like I need a few more...
1. Boeuf bourguignon (ala Julia Child, not by cheating with my crockpot)
2. Pretzel Bread Rolls
3. Kibbe (Lebanese dish)
4. Dulce de Leche Ice Cream
5. Cheese Pastelitos (Cuban pastries)
6. Bread Pudding
7. Beef Wellington
8. A Wedding-style cake (even a small one)
9. Beef Brisket
10. Duck a l'orange
11. Vegan cupcakes
12. Quiche
13. Croissants
14. Bagels
15. Gnocchi
Well, I need help! Please leave your suggestions in the comments below, or email them to me at Natyak1 (at) aol (dot) com. Thanks! And I look forward to seeing what you come up with! Time to get back into the kitchen....
Tuesday, April 19, 2011
Lemon Chicken Orzo in Tzatziki

I love me some Greek food. I really do. And, I'm all about Tzatziki sauce! I'm not ashamed to admit that, upon occasion, I but it premade from Costco. I don't remember which brand they carry, but it is tasty! I impulse bought some Tzatziki recently on a Costco trip and wanted to do something different. So, I just combined a bunch of stuff and this is what I got. Pretty yummy if you ask me!
First, I marinated chicken in the Tzatziki for a few hours. To start, I cooked some orzo and steamed some broccoli. (Not a real recipe today, folks- just a play by play!) I heated 2 tsp of oil and 1 tsp of butter in a deep skillet over medium heat. While that was heating, I cut the chicken into bite sized strips. Once the oil/butter was hot, I added 1 tsp of oregano and the chicken, turning the chicken every once in awhile to prevent them from burning. When the chicken was cooked, I deglazed the pan with 1/4 c of white wine and about 3 Tbsp of fresh lemon juice. I then added a few Tbsp more of Tzatziki (not the stuff from the marinade- fresh spoon fulls!) along with the orzo and broccoli. I mixed it and added salt and pepper to taste. Greek inspired dinner in 10 minutes flat= Happiness!
Tuesday, April 12, 2011
Poached Snapper and Sauteed Vegetables with Balsamic Reduction

I've been on a poaching kick lately. It's a super healthy and quick way to cook lean proteins. Last night, I decided to poach snapper. It cooked very quickly and easily. It was an easy fish to start with, because it becomes light and flaky when it is done cooking. I served it with sauteed vegetables in a balsamic reduction and a cucumber salad. The salad was made of sliced cucumbers, lemon juice, oregano, and olive oil. The tartness of the lemon juice helped cut the sweetness of the balsamic reduction. It was a very balanced plate of food. Sorry the pics are not so great- we were hungry and couldn't wait to start eating!
Poached Snapper
water
1 Tbsp whole peppercorns
1/2 c. white wine
1 Tbsp dried oregano
3 garlic cloves, whole
1 bay leaf
2 Snapper fillets
Fill a pan with about an 1 1/2" of water. Add wine, oregano, bay leaf and garlic. Bring water to a boil, then reduce to a small simmer. Place fish into pan and cover. Poach fish until it is cooked all the way through, about 8-10 minutes, depending on the size of your fillets. Remove from poaching liquid and dress with fresh lemon or a drizzle of olive oil.
You could also use chicken in the place of fish for this recipe. I often poach chicken this way, let it cool, then use it on salads for lunch. Quite yummy! The poaching liquid is mild so you can add bolder flavors if you'd like.
Sauteed Vegetables in a Balsamic Reduction
1 head of broccoli
1.5 lbs of green beans, trimmed
2 cloves garlic
1 onion, finely chopped
2 tsp. olive oil
1/2 c.balsamic vinegar
water
Fill a pot with 1-2" of water and bring to a boil. Add veggies and steam until mostly cooked. In a small saucepan, bring the balsamic vinegar to a boil, then reduce to a simmer. Try to use the best balsamic vinegar you have. Reducing the vinegar concentrates the flavor, so be sure it is something you really like! I use a balsamic that has been aged 30 years (birthday present from my friend Lauren-yes we buy each other food items for presents!). You can find good vinegars at most specialty markets. Meanwhile, heat olive oil in a saute pan. Add onions and cook until they brown. Add garlic and stir for about 30 seconds. Add steamed veggies. Toss to coat the veggies and the onion mixture. Add balsamic glaze. Yummy!!


Braised Short Ribs and Penne alla Vodka

Mmmm.... this one was really tasty!
I have had braised short ribs a few times before and finally decided to tackle them. I didn't have time to look for a recipe, so I just threw one together. Turned out great! I made the meat on a Sunday in the crockpot, then made the penne alla vodka on Monday night. I used homemade pasta sauce that I had previously made and frozen, so the sauce was a breeze. It was really, really good. I will be making the pasta again soon!
Together, the short ribs and pasta were perfect. The short ribs were so tender, and the red wine they were cooked in matched perfectly with the pasta. It tasted like a dinner you would get at a nicer restaurant. For about half the price!
Braised Short Ribs
5 lbs short ribs
1 1/2 quarts of beef broth
1 quart of red wine (I used a Cab Sav)- but you could just use all beef broth
3 Tbsp. Dried Oregano
3 Bay leaves
4 garlic cloves, smashed
1 onion, sliced
Salt and Pepper
Season short ribs with salt and pepper. Brown in a pan. Transfer directly to crockpot. Add remaining ingredients and cook on low for 8 hours. When the meat is done, it will be falling off the bone. Shred and set aside.
Penne alla Vodka
Penne, cooked al dente (I used about 1/2 lb)
2 Tbsp Fresh Basil
3 tsp Olive Oil
1/4 c. vodka (or less, but NOT more!)
1 c. tomato sauce
2 cloves garlic, minced
1 1/2 c. heavy cream
Salt and pepper
Grated Parmesan
Heat Olive Oil over medium heat. Add garlic and cook, about a minute. Add vodka (if you are cooking on a gas stove, beware of the flame) and allow the alcohol to reduce. Be sure to keep your face away from the pot at this point or you will inhale some nasty fumes! After about 7 minutes, add the tomato sauce and heavy cream. Bring the sauce to a boil then reduce to a simmer. Allow the mixture to cook until the sauce reduces a bit, about 7-10 minutes on a low setting. Season with salt and pepper. Toss with pasta then top with basil and Parmesan.
Serve the short ribs over the pasta and enjoy!
Note- if you don't want to cook the short ribs in a crockpot, I would try one of the following options:
A- Brown the meat, add remaining ingredients, then allow to simmer (covered) for about 5 hours.
B (preferred)- Brown the meat, add the remaining ingredients, then cover and cook in oven for 4 hours at 300°. Meat should be done by then. If it is not falling off the bone, cook for another 1/2 hour at 350°.
Tuesday, February 22, 2011
Finally
I'm finally getting around to posting!
Here's what my mother and I worked on for Christmas Day dessert:
For Valentine's Day, I made my hubby and his friend huge filled cupcakes. I actually made them using a mini bundt pan then cut out a hole in the middle. I filled them with Mocha frosting and put the lid back on. The frosting was a yummy suprise!

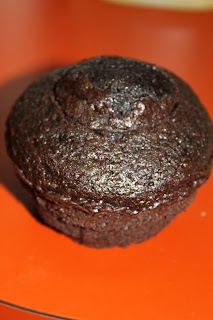
I also made mini cupcakes for his office

Aside from baking, most of my cooking has been for Abby. I'm loving making my own baby food! But, I have managed to get a few new meals into our bellies as well :) I guess I've been thinking Asian lately, I have Thai and Indian below!
Here's what my mother and I worked on for Christmas Day dessert:
 |
| Huge spread of mini desserts! |
 |
| Strawberry shortcakes |
 |
| Apricot Oat Bars |
 |
| Chocolate Mousse Cups |


I also made mini cupcakes for his office

Aside from baking, most of my cooking has been for Abby. I'm loving making my own baby food! But, I have managed to get a few new meals into our bellies as well :) I guess I've been thinking Asian lately, I have Thai and Indian below!
 |
| Red Curry Chicken and Shrimp over Basmati Rice |
 |
| Vegetable Dal |
Wednesday, December 8, 2010
Fresh Pasta

Being pregnant, I wasn't in the mood to use the Kitchen aid pasta attachments my parents got me for Christmas. So, this recipe was delayed until after Abby was born. This was the first time (to my knowledge) that I have ever tasted fresh pasta. It is SOO yummy! I will be making this over and over again. Goodbye dried supermarket pasta!
I wanted to do as much of this by hand the first time. So I did all of the mixing myself. I've heard that some people use food processors. I can offer no advice on that. So if you do, let me know how it turns out! To start, make a well in 2 cups of flour. To this, add 1 tsp. salt. Now comes the messy part. In the well, add 3 eggs. From here, start to incorporate the flour into the eggs. Work slowly at first, or else you will have an eggy mess all over your counter tops. Continue to add in more flour until you have a ball. Knead the dough for a few minutes, adding a drop or two of water if gets too dry (or flour if it gets too wet).


At this point you want to cut your pasta to whatever shape you want. I wanted spaghetti, so I ran my sheets through the spaghetti cutter. But, you can make any shape using a machine or by hand. After your pasta is cut, you can either hang it to dry or use it immediately. Remember, fresh pasta cooks very quickly! It only took about 1.5 minutes to cook my spaghetti.
Enjoy!!
Friday, November 19, 2010
Cooking with Martha
As some of you know, I'm a huge Martha Stewart fan. HUGE. So, of course, I jumped at the opportunity to download a free copy of her 2010 Thanksgiving Hotline cookbook. The 63 page, full color book is available for free download at:
http://www.sirius.com/wo/i/martha/2010/Martha_Stewart_thanksgiving_full.pdf
Let me know if you try any of the recipes! I have my eye on those fried stuffing bites with cranberry pesto!
http://www.sirius.com/wo/i/martha/2010/Martha_Stewart_thanksgiving_full.pdf
Let me know if you try any of the recipes! I have my eye on those fried stuffing bites with cranberry pesto!
Thursday, October 21, 2010
Just a quick update
Hi all. I know I’ve been missing in action for awhile now. I promise I will begin posting again soon! I gave birth to my baby girl on August 11th and I’ve just been focusing my time on her. Life is starting to get back to normal, and I’m back in the kitchen. So stay tuned!
On a side note, we began a family blog. It is open only to those people whom I invite, so if you are interested in reading it, send me an email to natyak1 at aol dot com and I will send you an invite.
Happy October!
Friday, July 30, 2010
Chicken with 40 Cloves of Garlic
I'm sure most of you have seen this recipe from Ina Garten. It's one of the episodes of Barefoot Contessa that is always on repeat on the Food Network. I really like this recipe because not only is it delicious, it's pretty easy. It does not require a lot of last minute work. So, it's great for company as I can prepare it ahead of time, and spend the evening with my guests- not in the kitchen. My Great Aunt and Uncle were here on vacation, and we wanted to have them over before they left town. Since weekends are pretty busy, we decided to have them over on a weeknight. Which is great and all, but 7 people for dinner on a weeknight can be a bit stressful. So, I made this recipe the night before! It warmed up beautifully. I served it with salad, a vegetable tian, and an angel food cake with strawberry compote for dessert. A lovely end to a nice visit with my family!
Chicken with Forty Cloves of Garlic
adapted from Barefoot Contessa, Food Network
3 heads of garlic, separated (not peeled)
chicken (use whatever you want. I like chicken thighs best for this dish, but add breasts as well)
1 Tbsp. Butter
2 Tbsp. Olive Oil
2 Tbsp. Heavy Cream
11/2 c. White Wine
2 Tbsp. AP Flour
1 Tbsp. Fresh Thyme
Salt and Pepper
Blanche garlic cloves in a pot of boiling water for 1 minute. Remove from water, peel, then set aside.
Heat butter and oil in a heavy pot over medium heat. Liberally season chicken with salt and pepper. Brown chicken in batches to avoid overcrowding the pot. When last batch is browned, remove from the pot. Add the peeled garlic cloves and sauté until they start to brown, about 5 minutes. Add wine and boil mixture for 5 minutes, making sure to scrape up any of the brown bits on the bottom of the pot. Return chicken and any juices that collected at the bottom of the plate to the pot. Add fresh thyme, then cover pot and simmer until your chicken is cooked. Depending on the amount of chicken you are using, this can take anywhere from 30 to 45 minutes. Once the chicken is cooked, take it out of the pot. Remove 1/2 c. of the cooking liquid and whisk in a bowl with the flour. Add the mixture back to the pot and whisk the sauce to make sure that there are no lumps. Add the heavy cream and bring to a boil. Cook for 3 minutes, then season with salt and pepper to taste. Add the chicken back into the pot and mix with sauce. Serve.
Note: Make sure you plan for your side dishes to be on the lighter side. While the chicken dish isn't too heavy, the cream sauce does give the dish a bit of heft. I wouldn't serve it with pasta or mashed potatoes or anything. Keep it light!
Monday, April 26, 2010
Adventures in Crock Pot Cooking: Baked Potato Soup
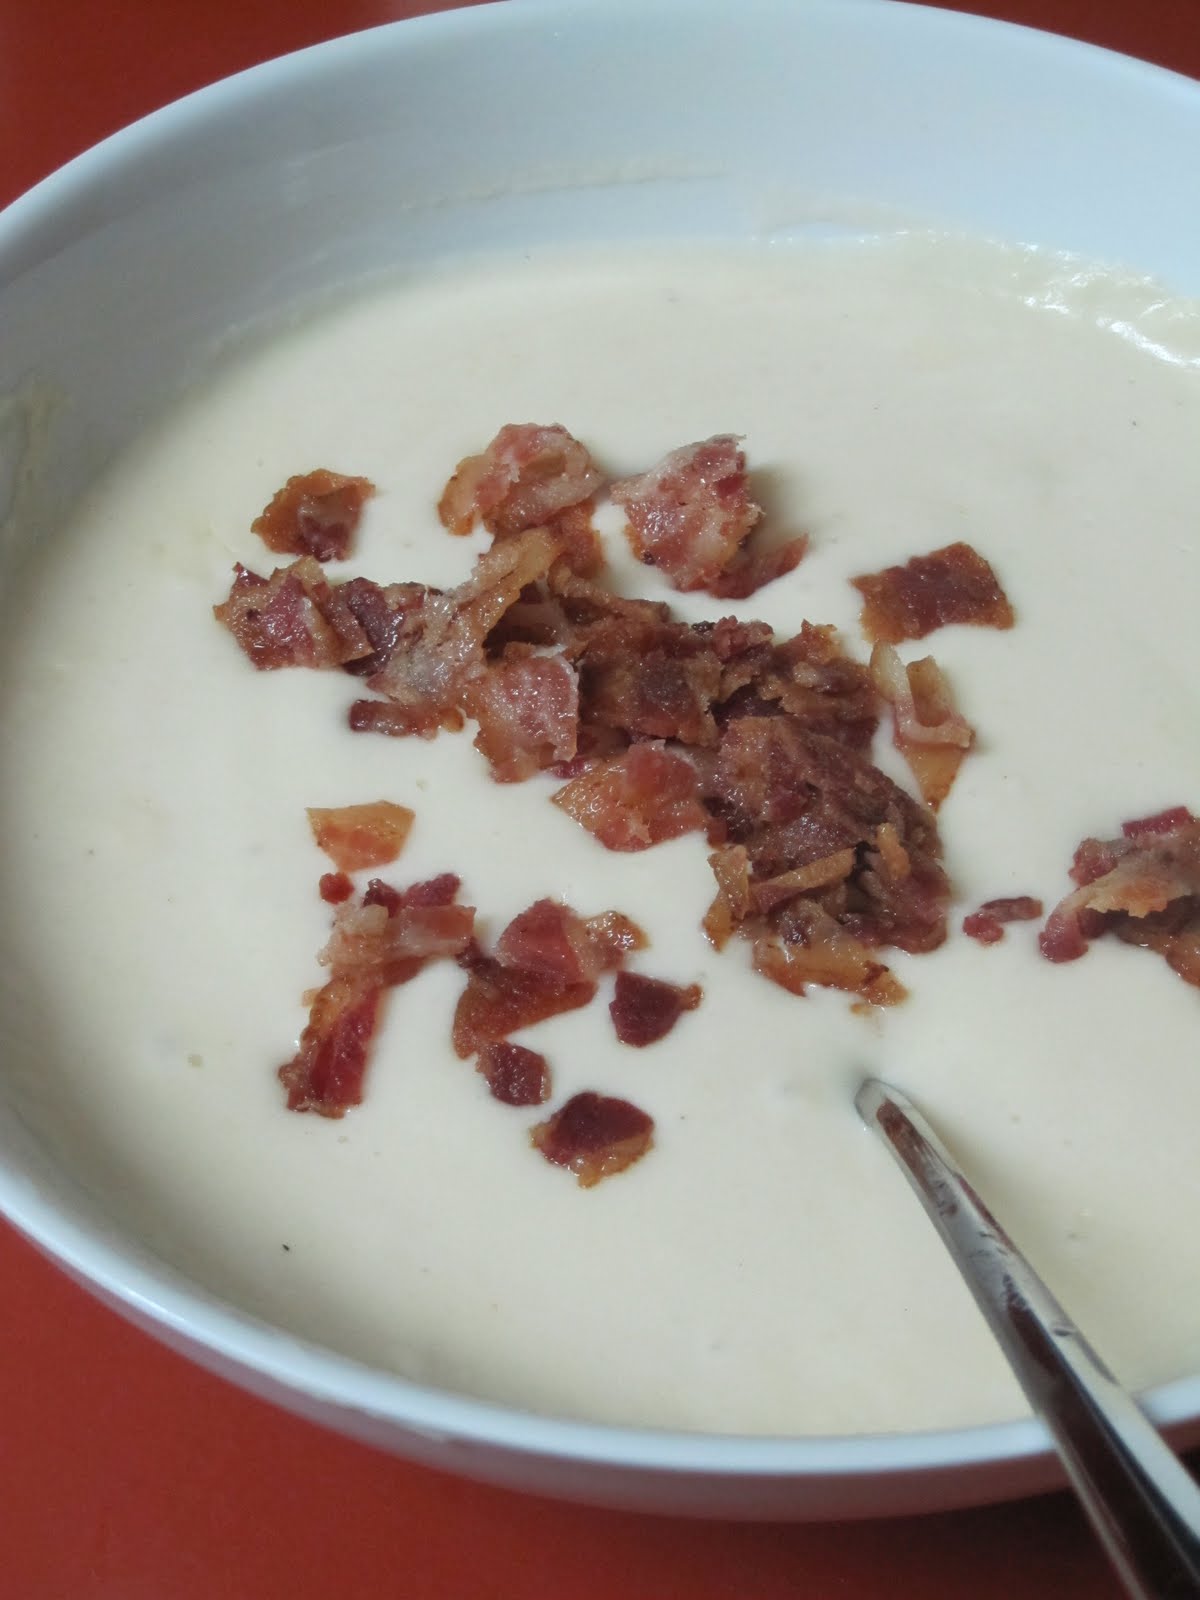
Thanks to Stephanie for this tasty recipe!
Baked Potato Soup
from Crockpot365
5 lbs potatoes, peeled and diced into 1 inch chunks
1 small onion, diced
4 cloves garlic, minced
1 tsp. seasoned salt
1/2 tsp. black pepper
1/2 tsp. red pepper flakes
2 quarts chicken broth
2- 8oz packages of cream cheese
Put the diced potatoes into the slow cooker. Add onion, garlic, seasonings, and the chicken broth. Cover and cook on low for 8 hours or high for 4 hours. The potatoes should be fork tender. Using an immersion blender (or a potato masher), mash the potatoes until smooth. Crumble in both packages of cream cheese, stir, and put the lid back on. Cook on high for 30 minutes or until cheese is melted (this took me about 45 minutes). Garnish and serve!
Thursday, April 15, 2010
Lemon Butter Chicken
I bought too many lemons. I don't know why I decided I needed a whole bag of them, but I did. So now, I have a ton of lemons in my fridge. And, while I always use fresh lemon juice, that's still a lot of lemons. I decided to try to make something for dinner that would use them up. I didn't have capers, or want to bother frying up chicken, so piccata was out. Enter: lemon butter chicken.
I didn't have a recipe or anything, just an idea that I wanted a quick chicken dinner (with lemons). I sliced my chicken into strips to cut the cooking time and cooked them in a pan with 1 tsp olive oil and 1 tsp butter. Once the chicken was mostly cooked, I pulled it out of the pan and set it aside. I added 2 minced cloves of garlic and the juice and zest of two lemons to the pan, and let that cook for a few minutes. I knew I wanted the sauce to be silky, so I then added a few additional tsp. of butter, one at a time, until I got to the desired consistency. I added a few slices of lemon for color, salt and pepper, and a pinch of herbs de provence. I then returned the chicken and the juices that had collected on the plate back into the sauce and let it all cook for another minute or so, until the chicken was warm. I served it with mashed potatoes and corn.
The chicken was really tasty. I was afraid that the acidity of the lemon would not play well with the amount of butter I added, but I was very happy with the outcome. All in all, it took me about 25 minutes to make the chicken. A very quick and tasty weeknight dinner. And, the hubby has already asked me to make it again-Success!

Friday, April 9, 2010
Birthday Cake

My husband loves cake. Loves it. So, for his birthday, I always make him his special birthday cake. I make it only for him, the same one every year, and he loves it. I love it. We all love this cake. So, if you have someone that you love more than anything, make them this cake on their birthday. They will love you for it. :)
Here is what you need to assemble this cake:
-2 sponge cakes. Make sure that you allow PLENTY of time for them to cool! After they have cooled, slice each cake into two layers, resulting in 4 layers of cake.
-1 batch of mocha frosting. Set aside 1 cup of this frosting to pipe on decorations later.
-1 batch of chocolate frosting
Place your first layer, cut side up, onto the cake stand. Make sure you center it now, becuase it will be too late later ( I always forget this step!) Brush a few teaspoons of the cake syrup onto the top of the layer. Spread on mocha frosting. Use as much or little frosting as you would like, but remember this is going to be a 4 layer cake- don't go overboard now! Top with second layer, cut side up. Again, brush on syrup, then frosting. Repeat with third layer. Brush the 4th layer of cake with syrup, then place it onto the cake, cut side DOWN. This will give you a smooth surface to frost on top. At this point you want to apply the crumb coating to the cake. This is the first round of frosting the entire cake. It is a thin layer of the mocha frosting, just ment to keep everything (crumbs) in place. After you have finished, place the cake into the fridge for at least 20 minutes to allow the frosting to set up.
When you are ready to continue, take the cake out of the fridge and frost the cake with the chocolate frosting. Everyone has their own method, so just do whatever works best for you. Once you are done, put the cake back into the fridge to set up while you prepare your piping bag. A few notes about piping: use the mocha frosting to decorate, as it is a different color as the chocolate frosting. It gives the cake a nice contrast of chocolatey colors. :) Also, when filling the bag, I find that it is easiest to stand the bag up in a large glass. This way, you save any frosting that escapes. Pipe the decoration around the cake, or you could use chocolate shavings if you don't want the hassle. I used a very basic decoration this year, as I was running out of time. But you can be as simple or elaborate as you want. Trust me, it doesn't matter. This cake is that delicious!
Enjoy!

Wednesday, April 7, 2010
Adventures in CrockPot Cooking...and an update :)
Well, it's been quite some time since my last post. There are the variety of reasons: I was busy, the holidays, and all of that other garbage. But, the real reason is that I'm pregnant :). I was sick throughout most of the first trimester, so there wasn't much cooking going on. Also, I've injured my leg, so I can't really stand for long periods of time. Suffice to say, I'm dying to get back into the kitchen! I've recently started to get back into my old routine, so be sure to look for more frequent posting. I'm over halfway through my second trimester now, and can't wait to meet our little girl!
Back to food. The Hubby has been sweet enough to be in charge of dinner (takeout) when I wasn't feeling well. But, I've been craving real food. I decided to give the old crockpot another chance. You may remember my Pulled Pork experiment. It turned out awesome, but that has been my only attempt at crock pot cooking. After some research, I decided I wanted to cook a bunch of protein to freeze and use as the base for other meals. During this time, my parents were sweet enough to buy me a new (bigger) crockpot with a digital timer. This made things MUCH easier!
I decided to cook pork, beef, and chicken. For the pork, I followed the same base recipe as the pulled pork. Instead of mixing the cooked pork with BBQ sauce, I froze it into smaller portions with a bit of the cooking liquid. I have since used the pork to make pork stir fry, pork carnitas, and BBQ sandwiches. I just pull a portion out of the freezer the night before to defrost and use it to cook a meal the next day. The cooking liquid is flavorful, but not too strong. So, the pork is easily adaptable.
I went the same route with the beef. For the recipe, go here. While I used a roast, I think it would be perfectly acceptable to use just about any type of beef. Go with whatever is on sale at the supermarket! I've used this beef on its own as pot roast, or in dishes such as beef lo mein and a modified picadillo. I plan on using it again tonight for quick fajitas.
The chicken was a bit more risky for me. I pretty much eat boneless, skinless chicken breast. I know, it's boring, but it's what I like. I do like thigh meat from time to time, so I decided to use 4 huge chicken thighs for my crockpot experiment. I didn't really know what to put into the pot, so I just threw in a bunch of things. For the "recipe", go here. The chicken turned out great. I shredded the chicken and used it in a thai salad and in quesidillas. Next time, I will use more chicken. 4 thighs really wasn't much meat for 2 people to eat 2 meals. Both the pork and beef base recipes made enough for the 2 of us to eat at least 4 meals-I still have some left!
My thoughts on the crockpot: I love this thing. I know I'm the last one to the party on this topic, but I'm glad I finally tried it out! I'm still a little weary of leaving applicances plugged in while I'm away from home, so I just set it to cook overnight. I turn the crockpot off in the morning and leave everything to cool while I'm at work. I usually flip the meat over so that the whole thing gets time to soak in as much of the yummy flavor as possible. I have enjoyed making my regular dinners again, and it has been helpful to have the protein already cooked. On nights where I'm busy or tired, I can use prepare dinner in about 20 minutes. Next up in my crockpot trials: Baked Potato Soup- check back soon!
Note: I will add pictures as soon as I can.
Wednesday, December 30, 2009
The best damn arroz con pollo ever!!!
...if I do say so myself!
I grew up (and still reside) in South Florida, a melting pot of different cultures and flavors. Out of all of the different ethnic cuisines, Cuban food is my favorite. I make different Cuban recipes at home regularly, and visit local restaurants for the more difficult to prepare dishes. One of my favorite dishes, Arroz con Pollo, is not to be purchased. It is to be made by someone's abuela, who has just the right touch. I am lucky enough to know such a woman, but I don't get to see her too much. Therefore, my arroz con pollo consumption has gone way down.
Last week, I decided that enough was enough. I tackled Arroz con Pollo. And let me just say....oh my gawd, was it good. We could not stop eating it. We ate it out of the pot. We ate it for lunch, dinner, and maybe a midnight snack or two. I made a lot, thinking I would freeze half of it for another night's dinner. How foolish. That stuff was gone before we realized it. And now, we mourn it's absence. I'm not sure, but this may just be the best thing I've made all year. So go and make yourself some Arroz con Pollo. Please. And be sure to save some for me!!
Here is my recipe. I will not say that all of the ingredients are found in authentic recipes. I have no idea. I couldn't find one in English, and my Spanish is a bit rusty these days. But, the outcome was the same as any abuelas' that I've had. So there!
As with almost all Cuban food, Sofrito is the base to this dish. I've seen it frozen at the supermarket before, but never tried it. I just make my own. But, by all means, feel free to purchase some if you wish to do so. Also, I used chicken breast. But, I usually see it being made with a whole chicken. Again- up to you.
Enjoy!
Arroz con Pollo
1 pound of chicken, cut into strips
8 oz of canned tomato sauce
1 onion, finely chopped
1 green bell pepper, seeded and finely chopped
1 red bell pepper, seeded and finely chopped
1/3 c. olive oil
4 cloves garlic, minced
1 bay leaf
1 tsp. cumin
3 1/2 c. chicken stock
1 12 oz. bottle of beer (use whatever you have on hand, or substitute in more stock)
1/2 c. white wine (or you could substitute in more stock)
1 1/2 c. Valencia rice
5 threads of saffron
Juice of 1 lime
Frozen peas
Soak rice in water for at least an hour. Drain and set aside.
Liberally coat chicken with salt, pepper, and lime juice. Heat olive oil in a large oven safe pot and brown chicken. Do this in batches as to avoid overcrowding the pot. Set chicken aside.
Add onions, peppers and garlic to the pot and sauté. Cook for 5 minutes, then remove and grind up the veggies in a food processor. This is the beginning of the sofrito. Some people leave the veggies chunky, but I like mine pureed. Return the sofrito to the pot and add the tomato sauce, bay leaf, and cumin. Cook for a few minutes, stirring frequently.
Return the chicken and any juices to the pot, and add the wine and beer. Cook for 7 minutes, then add the chicken stock. Bring the mixture to a boil, then add the drained rice and saffron threads. Bring to a boil once again, then cover the pot.
Bake the mixture at 350° for about 20 minutes. Finally, remove the pot from the oven and the frozen peas. My hubby isn't too fond of peas, so I only added about 3/4 of a cup, but feel free to go wild. Fluff the rice and serve.
I wish I had a wonderful picture to share with you, but I didn't take the time. We really couldn't stop eating the stuff, and I barely grabbed this one before the bowl was empty! I know it doesn't look great, but trust me- this recipe is a keeper!!

Roasted Vegetable Puree
I made this soup about a month or two ago and never got around to posting it. It was one of those lovely fall days, where the South Florida weather was actually nice, and my local supermarket had quite a variety of fresh produce. (Those of you that know me know that I really dislike buying supermarket veggies)
I cut up and liberally coated my veggies with salt, pepper, olive oil, and a bit of thyme and rosemary from my garden. I roasted them at 420° until a fork easily went through the vegetable. Since I had different types of vegetables that would take various amounts of time to roast, I made sure to put similar vegetables together in each pan.
- about 5 parsnips, peeled and chopped
- about 7 carrots, peeled and chopped
- 1/2 of a large butternut squash, peeled and chopped

The second pan contained:
- 1 sweet potato, chopped
- 3 zuchinni, sliced
- 4 yellow squash, sliced

The third pan contained asparagus.

Once all of the vegetables were roasted and cooled, I blended them with a bit of chicken stock in my food processor (a blender would work if you have one- I don't). Once all of the vegetables were blended, I brought the puree to a boil, and adjusted my seasonings. At this point, I added about 2 cups of chicken stock to mine, as I like a thinner consistency, but you could leave yours thicker if you prefer. Once everything was warm, I divided the puree into containers and froze half of the recipe for later.

Subscribe to:
Posts (Atom)